You're standing in a Cherry Hill bathroom with a tape measure in hand, trying to decide whether the proposed walk-in shower will fit. You ask for the minimum size and get three answers: one from a code discussion, another from a bathroom designer, and a larger one from an accessibility guide. They aren't necessarily contradicting one another. Each answer describes a different threshold, for a different purpose.
Understanding walk-in shower minimum dimensions means separating what may meet residential code from what feels practical day to day and what's designed for accessible use. The right choice depends on the people using the shower, the available floor area, and the finished dimensions after the walls and fixtures are accounted for.
Table of Contents
- Why Three Different Minimums Govern Your Shower
- The Code Minimum and What It Really Allows
- Scaled Layouts for Everyday Comfort
- ADA Transfer and Roll-In Showers Explained
- Curbless Design and the Hidden Trade-Offs
- Choosing the Right Layout for Your Household
- Planning Your Project From Dimensions to Permits
Why Three Different Minimums Govern Your Shower
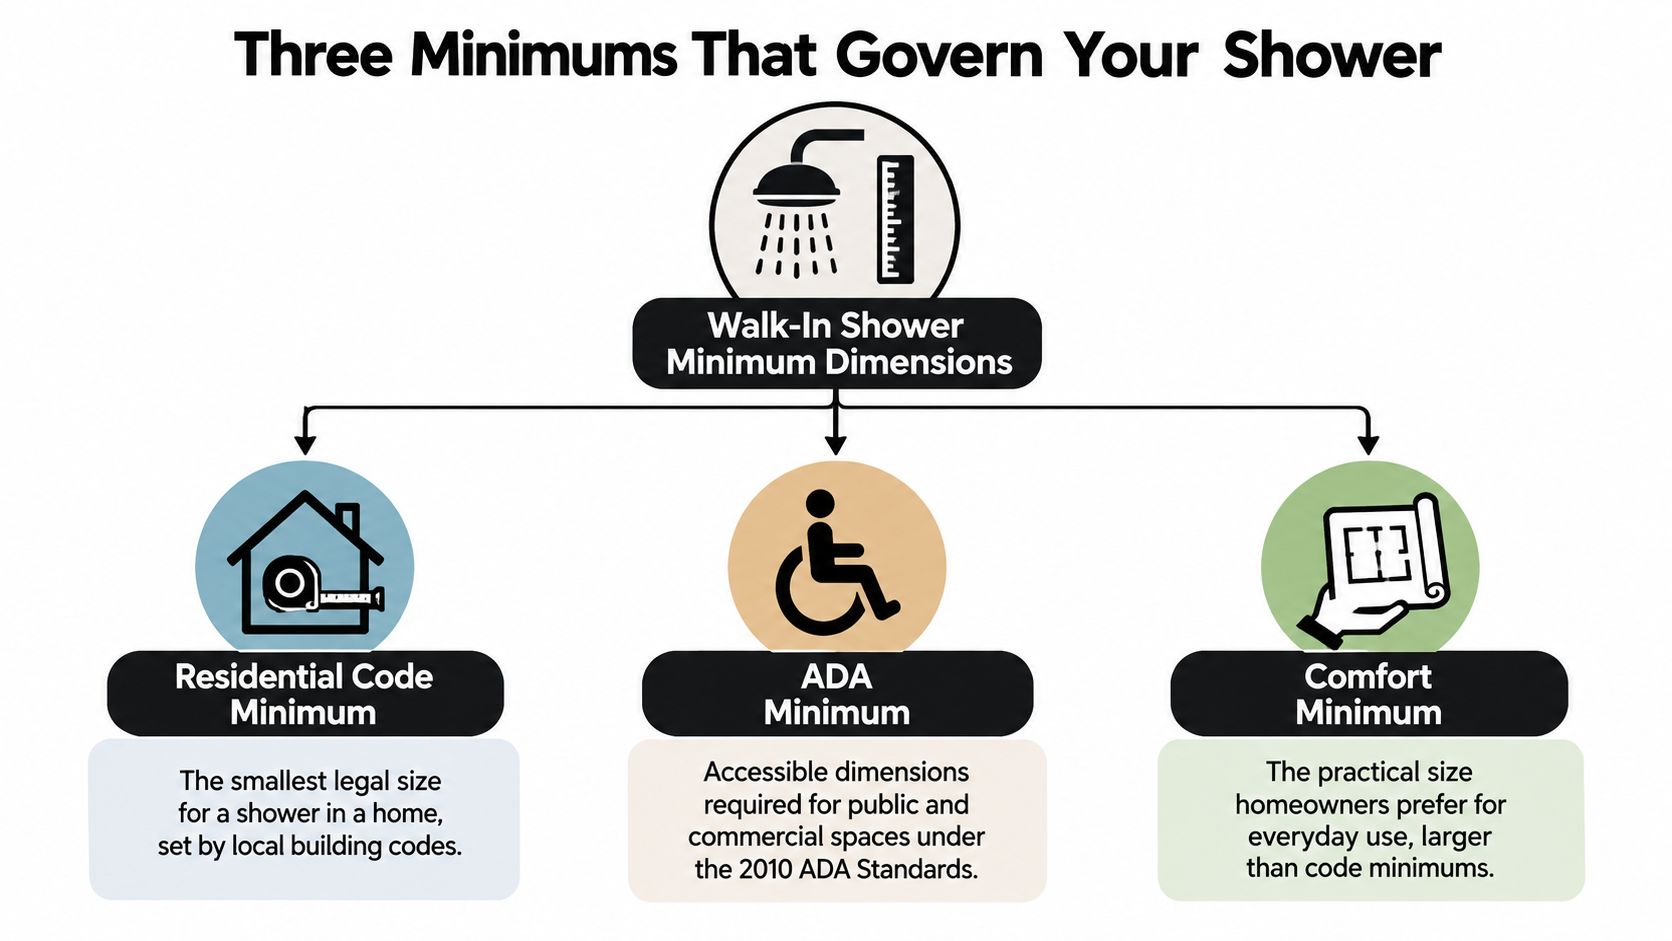
A shower that squeaks past the legal minimum and a shower that welcomes a wheelchair can both be called "compliant." They answer to different yardsticks. The three thresholds work like door widths in a house: one lets you squeeze through, one lets you carry in a laundry basket, and one lets a chair pass straight in. Knowing which yardstick applies to your project matters more than memorizing any single number.
Three thresholds, three trade-offs
The residential code minimum sets the floor, literally and legally. The International Code Council's residential-code study material describes a permitted arrangement with 30 by 30 inches of interior area and 24 inches of clear floor space in front of the opening (ICC residential-code study material). What you give up at that size is freedom of movement. You can stand and turn, but bending to wash a foot or reaching past the showerhead gets tight fast.
The practical comfort baseline asks a different question: can you move naturally while washing, and can the layout accommodate fixtures and storage without crowding you? The NKBA recommends at least 36 by 36 inches of interior space for more functional everyday use (NKBA Bathroom Planning Guidelines). What it costs is floor area. Those extra inches have to come from somewhere, usually the vanity run or the open floor in a smaller bath.
The accessibility standard serves people who transfer to a seat or roll in with a wheelchair, and it spells out specific compartment shapes and clear spaces. Under the 2010 ADA Standards, a transfer shower and a roll-in shower follow distinct measurements and requirements (U.S. Access Board shower-compartment standards). Here the sacrifice runs the other direction: compactness. Accessible showers need room for approach, transfer, or a rolling entry, so they trade a small footprint for independence.
Practical rule: A dimension that meets a residential baseline isn't automatically comfortable, and a comfortable layout isn't automatically an accessible one.
Treat the three numbers as filters applied in order. The code sets what may be built, comfort sets what your household will enjoy using, and accessibility sets what the space may need to support later. A guest bath used twice a year can often stop at the first filter, while a primary bath in a home you plan to keep should pass all three.
The Code Minimum and What It Really Allows
A 30-by-30-inch shower works like a parking space that technically fits your car. It passes, but you open the door carefully. Under IRC-style residential guidance, that footprint is a starting threshold rather than a comfort target: it provides about 900 square inches of interior area, the rules call for a 30-inch-diameter circle to fit inside the finished compartment, and the doorway needs roughly 22 inches of clear access opening (per the ICC residential-code study material cited earlier).
Those numbers describe finished, usable space, and that distinction trips up more homeowners than the dimensions themselves. A wall assembly consumes room on every side: backer board, waterproofing membrane, mortar, tile, and the channel that holds a glass panel. A shower framed at exactly 30 inches can finish well under it once those layers go in. Verify the interior measurement after the build-up, not the rough opening between studs.
Why the circle matters
The diameter requirement works like a stencil laid on the floor. If a 30-inch disc cannot rest flat inside the finished space without crossing a wall, curb, or fixture, the compartment fails even when its length and width look adequate on paper.
That is why area alone proves nothing. Two showers can share the same square inches but different shapes, and a corner seat, angled entry, or projecting valve handle can break the clear zone the circle is meant to confirm. The 22-inch opening deserves the same scrutiny, because a shower can pass the footprint test while its entry still pinches at the door. Glass panels, hinges, and hardware all cut into what you can walk through, so treat them as layout decisions rather than finishing details.
Code-compliant doesn't mean comfortable
The NKBA guideline cited earlier recommends at least 36 by 36 inches inside, and the difference is physical rather than cosmetic. At the smaller footprint, an average adult may struggle to raise both arms to wash their hair or turn without brushing a wall or a fixture projection. Recessed storage preserves the envelope. A protruding shelf steals space the drawing appeared to offer.
For a South Jersey remodel, treat the smallest dimension as a verification step rather than a design goal. Municipalities adopt different code editions, and the permit reviewer applies whichever version your township recognizes. Confirm the required interior clearance and the clear opening with your building department before the layout is locked in.
Scaled Layouts for Everyday Comfort
A shower can pass inspection and still feel cramped every single morning. One homeowner learned this after her contractor installed a perfectly legal stall she could barely turn around in. Each step up in footprint buys back a specific movement the smaller size took away, so read the dimensions below as a sequence of trade-offs rather than a menu of options.
What the footprints feel like
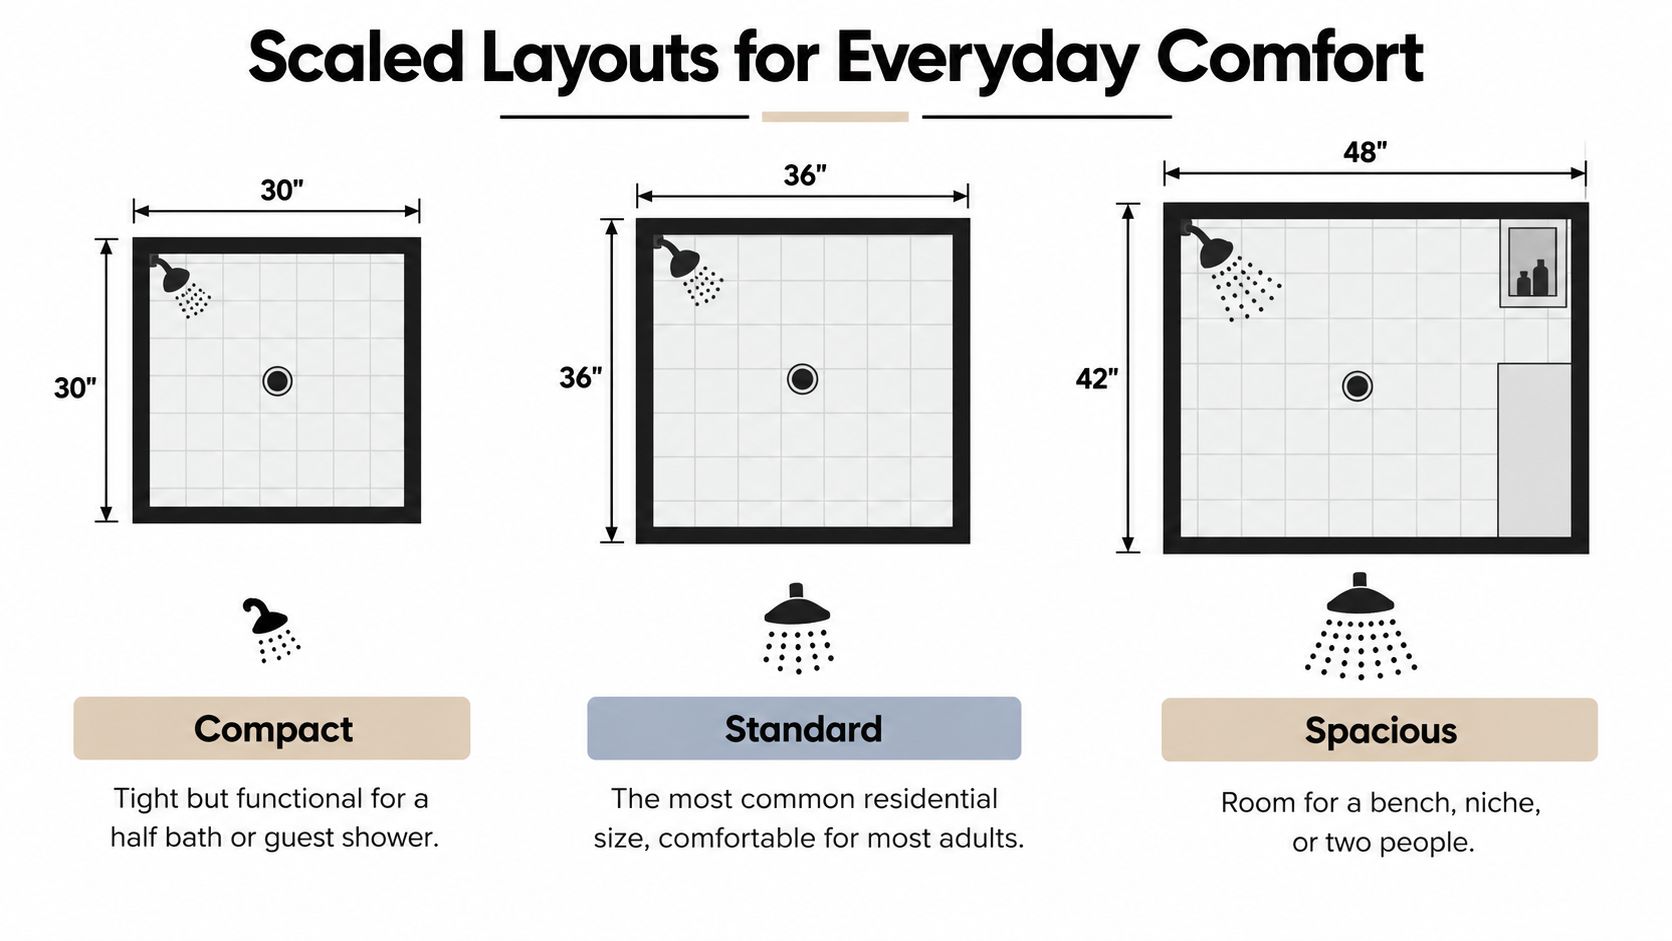
30 by 30 inches works like a phone booth with running water. You stand, you wash, you get out. A guest bath can live with that arrangement, but expect to angle your body around the valve handle and accept that stepping back from the spray means touching the rear wall.
36 by 36 inches is the first footprint where an adult can face any wall without planning the turn, consistent with the NKBA recommendation cited earlier. A single user can pivot, reach the controls, and rinse without brushing glass or tile. Two adults still cannot share it well, and a corner seat removes the very clearance that makes this size work.
42 by 48 inches changes the geometry from a box into zones. The layout gains a dry end for the controls and a wet end for the spray, with room left for a bench. Placement still decides whether that bench helps or shrinks the standing area it was meant to improve.
42 by 60 inches supports a bench plus a separate entry zone away from the showerhead, a layout that suits aging in place or anyone who wants to turn the water on without standing under it. Size does not guarantee comfort. Door position, glass panels, drain slope, and spray direction decide how much of that floor stays usable.
A footprint only succeeds in context. The shower shares the room with the vanity, toilet, and door swing, so adding six inches to the stall can subtract them from the walkway. For ways to balance fixtures and storage in a compact room, see these small-bathroom design ideas for Cherry Hill homes.
Before committing to a layout, tape its proposed edges on the bathroom floor and open the door. That ten-minute test exposes trade-offs no drawing will: a wider shower may cost you a linen cabinet, a clear path past the vanity, or the glass configuration you wanted.
ADA Transfer and Roll-In Showers Explained
An accessible shower is engineered around a sequence of movements: approach, position a wheelchair or walker, transfer or roll in, reach the controls, bathe. The ADA dimensions exist to keep every step of that sequence possible, which is why the entry, outside approach area, seat, controls, and grab bars are specified as one coordinated set rather than isolated measurements.
Transfer shower
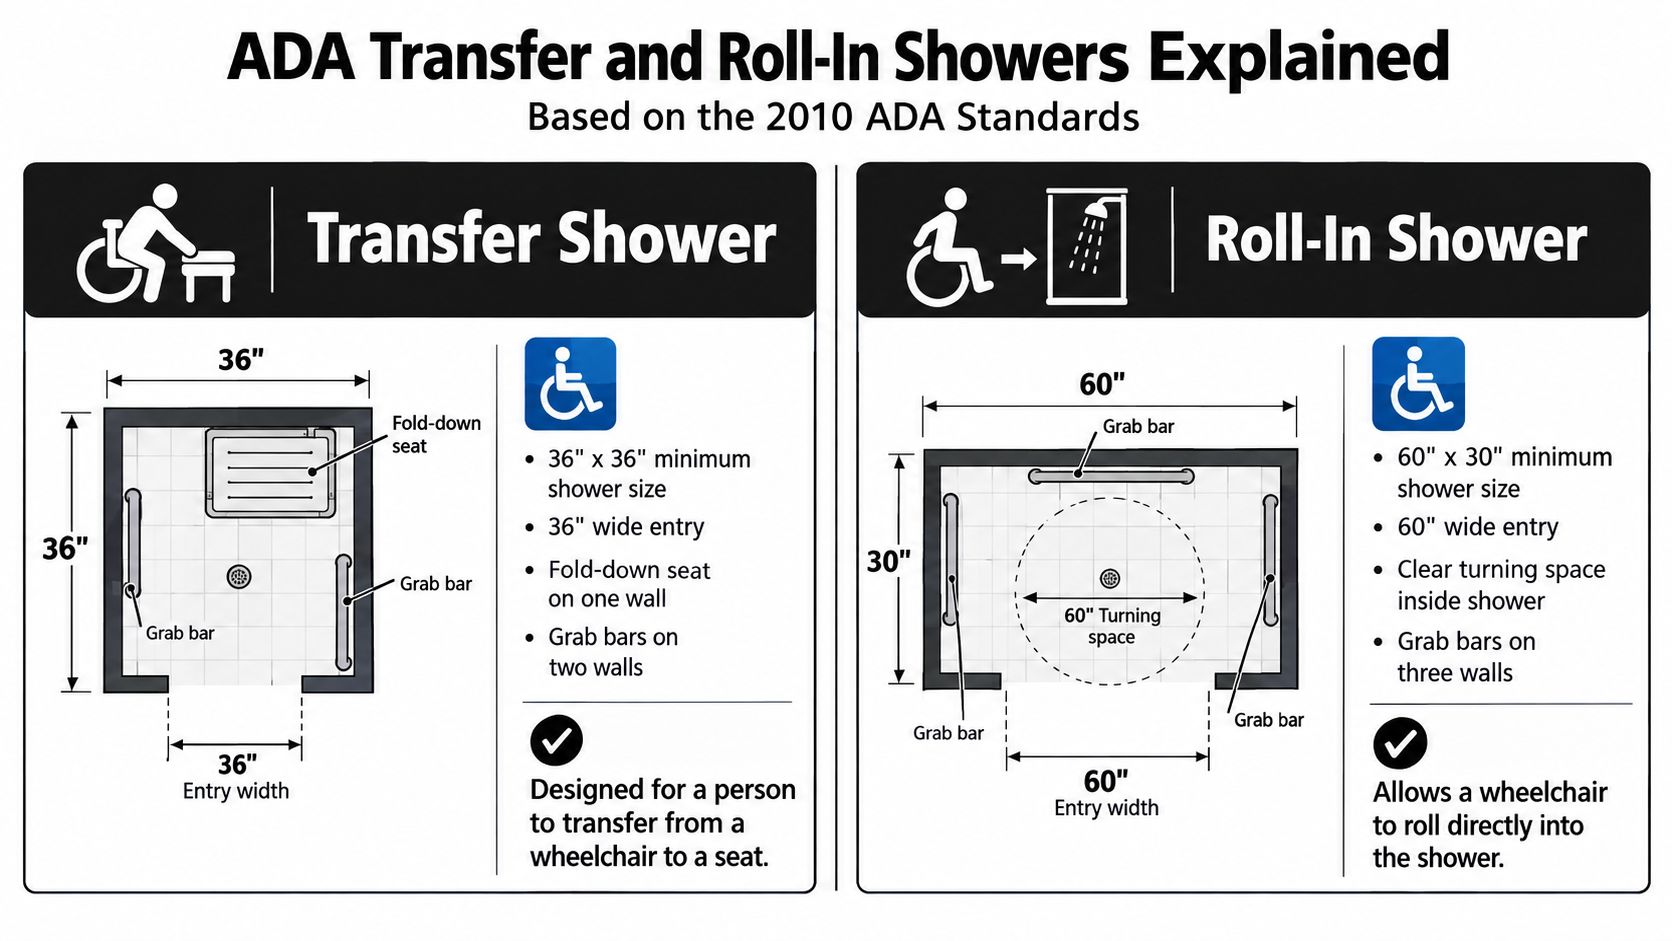
Under the 2010 ADA Standards, a transfer-type compartment needs 36 by 36 inches of clear interior space, a 36-inch-wide minimum entry, and a 36-by-48-inch clear floor area outside the opening for the approach and transfer.
Those are finished, usable measurements taken to defined reference points, so a nominal square on the plan is only the starting point. Wall thickness, a curb, grab bars, the seat, and the door all consume clearance, and each one has to be accounted for before the stall is framed.
The transfer layout assumes someone moves sideways from a mobility device onto a fixed seat. That assumption explains a detail that surprises many homeowners: the U.S. Access Board treats these interior dimensions as fixed minimums rather than numbers that improve as they grow. Enlarge the compartment carelessly and the seat, controls, and grab bars can drift beyond functional reach.
With this threshold, more space can mean less access.
Roll-in shower
A standard roll-in compartment calls for at least 30 inches wide by 60 inches deep with a 60-inch-wide entry. An alternate configuration runs 36 inches wide by 60 inches deep with a 36-inch entry positioned at one end, as the 2010 ADA Standards for Accessible Design set out.
The difference between the two layouts is how the user gets in. Roll-in lets a wheelchair enter the compartment itself; transfer builds around a seat and a defined approach for moving onto it. Entry width alone settles neither case. The clear floor area beside the opening, control placement, seat strategy, and threshold have to work together.
Accessibility is a layout, not a doorway width. A wider opening cannot compensate for a missing approach area or controls sitting out of reach.
These standards do not automatically apply to every private home. They still make a reliable planning baseline for aging in place, because they describe geometry already tested against real mobility needs. For ways to coordinate accessible features across the whole room, see this guide to universal design for Cherry Hill kitchens and bathrooms.
Curbless Design and the Hidden Trade-Offs
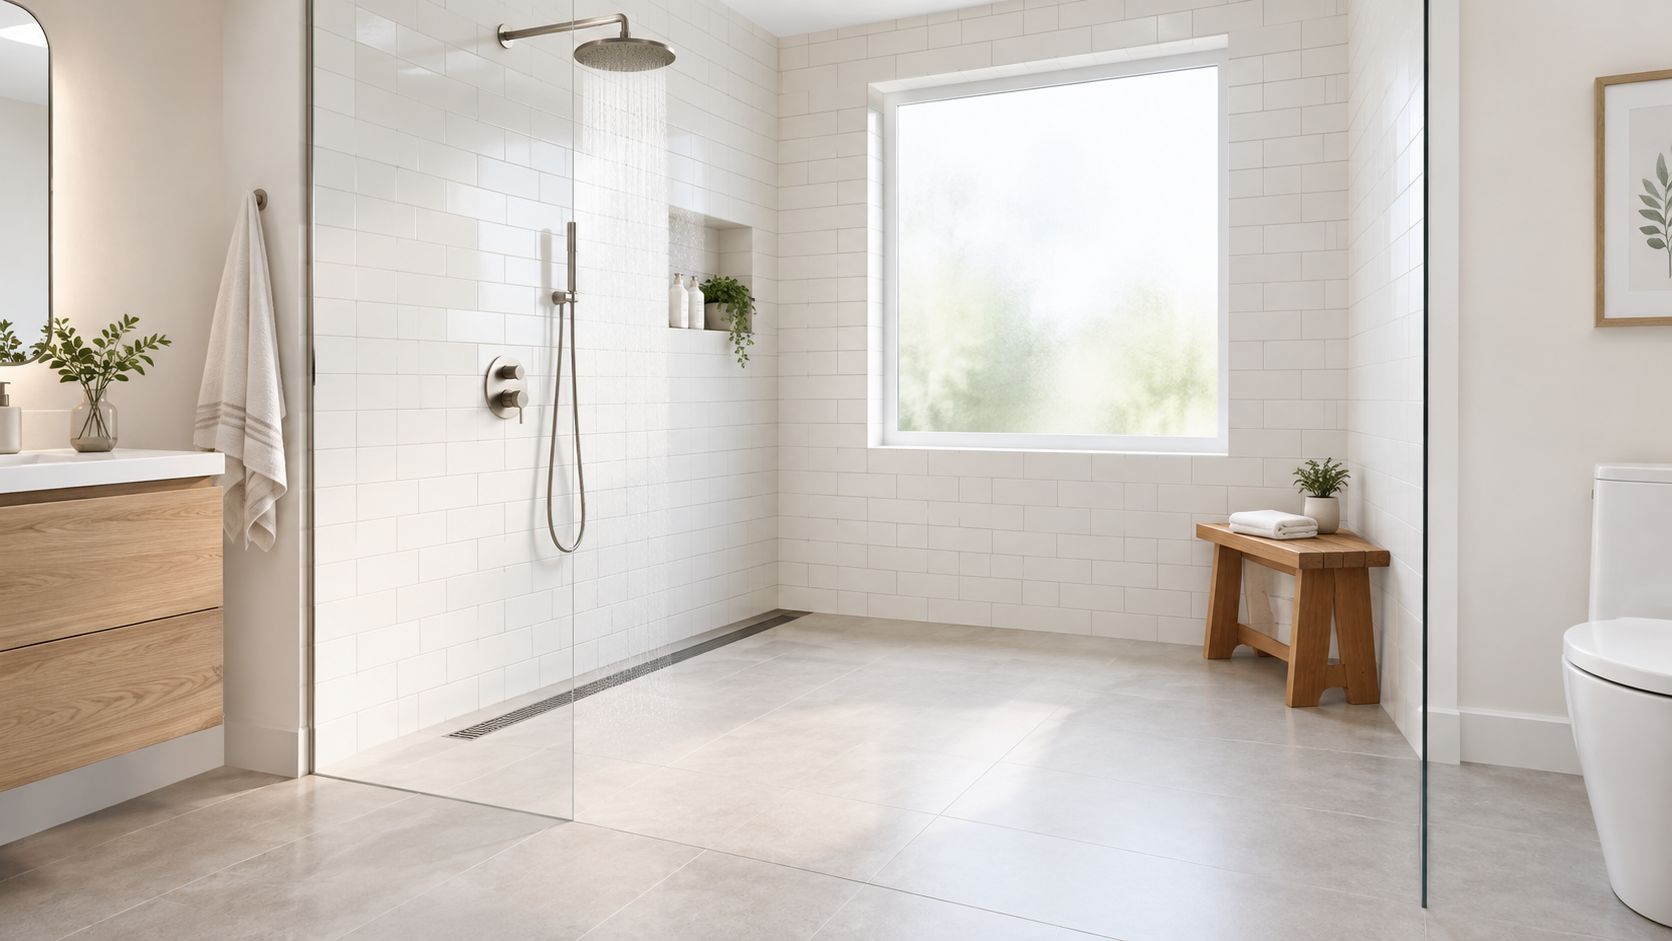
A curbless shower can create a continuous floor and an easier entry, but removing the curb doesn't remove the need to manage water. The floor has to direct water toward the drain, and that slope must be planned alongside the finished floor level outside the shower.
The drain position influences the floor shape. A layout using a linear drain at the wall line can support a different slope arrangement from a point drain, which draws water toward a central low point. Either way, the slope, shower entry, and spray area need to work together so water stays where the waterproofed floor can handle it.
Build the finished size into the plan
Waterproofing and finish materials affect the inside measurements. The substrate, membrane, mortar, tile, and glass attachments all take up space, so a rough opening shouldn't be mistaken for the finished shower. A nominal 36-by-36-inch rough opening could yield a smaller finished interior, such as 34 by 34 inches, depending on the specified assemblies.
That example illustrates why the finish schedule belongs in the dimensional plan. The designer and installer need to know what wall and floor systems will be used before deciding that the shower meets the intended size. This matters especially when clear interior dimensions are part of an accessibility layout.
A curbless design also connects the shower to the rest of the bathroom floor. The drainage path, waterproofing boundaries, entry, and adjacent materials need to be resolved together, rather than selected independently after the footprint is set. When comparing surfaces for the wet area, review the practical considerations in these shower-floor options.
Before approving the plan, confirm that the drain location matches the intended slope, the waterproofing system is specified, and the finished shower dimensions remain usable after tile and glass are installed. If any of those details change, recheck the layout rather than assuming the original measurements still apply.
Choosing the Right Layout for Your Household
Choose the shower by asking who uses it now and how those needs may change. A compact enclosure can be a reasonable choice in a guest bath, while a primary bath used every day may benefit from more room to move and store essentials.
| Layout tier | Example footprint | What it supports | Main trade-off |
|---|---|---|---|
| Compact | 30 by 30 to 36 by 36 inches | A constrained guest bath or a single user without mobility planning | Less room for movement, shelves, or a seat |
| Mid-size | 36 by 48 to 42 by 60 inches | More comfortable everyday use, with greater flexibility for controls and storage | Uses more of the bathroom's available floor area |
| Accessible transfer | 36 by 36 inches inside, with the required approach and entry | A transfer-style layout built around a seat and functional reach | Requires coordinated clearances beyond the enclosure |
| Accessible roll-in | 30 by 60 inches or the alternate 36 by 60-inch configuration | A layout designed for wheelchair entry | Needs a suitable opening, approach, and carefully coordinated features |
The accessible examples in the table refer to specific ADA configurations, not universal sizes for every home. For the exact entry and outside-clearance requirements, use the applicable standards discussed above.
Think beyond today's routine. If someone may need a bath seat, caregiver help, or a mobility device later, account for those possibilities before you commit to a smaller footprint. A tub-to-shower project also needs to fit the room's plumbing and circulation, so compare the shower plan with the wider bathroom remodeling options for a tub-to-shower conversion.
Planning Your Project From Dimensions to Permits
A shower that measures correctly on paper can still fail inspection once the walls go up. The gap between a drawn dimension and a finished one is where most planning mistakes happen, so treat your chosen layout as a starting point rather than a final answer.
You now have three numbers to weigh: the code floor, the comfort range, and the accessibility standard. Before you commit to one, confirm which rules apply. For a South Jersey renovation, your designer should verify the locally adopted IRC or IPC edition, because state and local adoption can modify the baseline residential requirement. A township on an older code cycle may enforce a different threshold than the national text suggests.
Next, calculate the finished interior after the wall and floor assemblies are specified. Tile, mortar, waterproofing membrane, and glass channels all eat into the rough opening the same way framing eats into a room's listed square footage. As the curbless-design section showed, a measurement taken before those layers are chosen is only an estimate.
Run through this checklist before signing off on the shower footprint:
- Confirm local requirements. Ask the municipality issuing your permit which code edition applies.
- Measure finished space. Account for waterproofing, tile, mortar, and glass channels, not just the framing.
- Locate plumbing and controls. Position the valve and showerhead for the layout and the reach of the people using it.
- Check the surrounding bath. Review the entry, door swing, vanity, toilet, and walking path, since a compliant enclosure can still crowd the room.
- Choose your governing threshold. Decide whether code compliance, daily comfort, accessibility, or a combination sets your target.
Picking that governing threshold deliberately, with the trade-offs understood, produces a better result than splitting the difference by accident.
The Cabinet Coach coordinates bathroom design with selections such as cabinetry, tile, countertops, and hardware, helping homeowners plan the shower as part of the full room. For project guidance in the area, review the company's South Jersey bathroom remodeling services.
The Cabinet Coach brings a mobile showroom and personalized design guidance to South Jersey homeowners planning bathroom renovations, including coordinated cabinetry, tile, countertops, and hardware selections. Visit The Cabinet Coach to discuss a shower layout that fits your home, your household, and the dimensions that matter most.